Trevor Edwards

Trevor Edwards

  • Contact
  • Archive
  • GitHub
  • LinkedIn
  • Jamf Remote Assist is here!

    Today’s release of Jamf Pro 11.1.0 includes the much anticipated release of Jamf Remote Assist.

    This is a feature I’ve been looking forward to since the deprecation announcement for Jamf Remote. I think having some kind of built-in remote control functionality is a must for a MDM in this day and age.

    The new tool is a little on the bare & buggy side, but I have a feeling that it will be something that the engineering team at Jamf will be giving some extra love to in the coming months.

    Enabling the feature is pretty straight forward. Sign into your Jamf Pro portal and navigate to Settings > Computer Management > Security. Click Edit (lower right-hand corner), select the Jamf Remote Assist checkbox, and click Save.

    To initiate a Jamf Remote Assist session, find the computer you wish to connect to in the Jamf Pro portal and navigate to the Management tab and click the Start Session button under Remote Assist.

    If the user is logged in to their computer, the remote session starts as an attended screen sharing session. The user is notified that a screen sharing session is about to begin and that they can Accept or Decline.

    When the session is ended the user gets a nice message with some summary details:

    The updated section in the Jamf Pro Admin Guide that covers Remote Assist also mentions unattended sessions:

    The Jamf Remote Assist session cannot start if the user declines or ignores the prompt. The session opens in a new browser tab with a spinning wait cursor shown. The admin is prompted for a set of local account credentials. If the user is not logged in to their computer, the remote session starts as an unattended session. No action is needed from the user.

    https://learn.jamf.com/bundle/jamf-pro-documentation-current/page/Jamf_Remote_Assist.html

    In testing, on both virtual and physical machines, I wasn’t able to get an unattended session working. I’d click Start Session and the wheel would just spin endlessly. Nothing would happen on the target machine and a new browser tab never launched.

    Additionally, I saw all kinds of weird behavior with the Profile that installs allowing Remote Assist to work. Sometimes the Profile would appear multiple times on the list of Profiles installed on the machine.

    On other machines it would appear to remove and reissue the Profile over and over again, but fail each time:

    And then sometimes Remote Assist would just fail to start:

    Conclusion?

    I think Remote Assist is an excellent addition to Jamf’s ever-growing suite of tools. However, it needs a little more work before it can be used as a reliable troubleshooting tool. I’ll be playing with it more throughout the week and will probably update this post as I go. I’m especially interested in trying out the file transfer feature!

    What are your thoughts on Jamf Remote Assist?

    23 November 2023
    Review, Spotlight
    enterprise, jamf, jamf pro, jamf remote assist, macos, mdm
  • Computer Rename Prompt w/swiftDialog

    Recently the need arose for our techs to be able to easily reset device names. I wanted a script that I could deploy via Self-Service that would prompt the user and change the machine’s name based on the input.

    swiftDialog was the obvious framework choice, but before I reinvented the wheel I wanted to see if someone else had already done the hard work.

    Turns out, they had! I love when that happens.

    Adam Codega has a great script that does exactly what I needed it to.

    I have to call the icon out because it’s such an awesome touch. The script detects whether the device is a laptop or desktop and displays the appropriate icon. I’m a sucker for details like that!

    I modified some of the GUI elements and added a bit of code to display the serial number to make it easier for the tech/user who is setting the name of the machine.

    I also added a Jamf Recon command to update the computer’s inventory record. This is completely optional and if you don’t use Jamf you can easily remove that bit.

    #!/bin/bash
    
    # Credit to https://github.com/acodega
    
    # Get serial number using system_profiler
    serial_number=$(system_profiler SPHardwareDataType | awk '/Serial/ {print $4}')
    
    # Displays icon based on type of device
    hwType=$(/usr/sbin/system_profiler SPHardwareDataType | grep "Model Identifier" | grep "Book")  
    if [ "$hwType" != "" ]; then
      icon="SF=laptopcomputer"
    else
      icon="SF=desktopcomputer"
    fi 
    
    dialogApp="/usr/local/bin/dialog"
    
    title="Computer Name Prompter"
    message="Please set the name of this device. \n\n Department Code + Serial Number + L/W (Laptop or Workstation). \n\n Your computer's serial number is: $serial_number"
    
    dialogCMD="$dialogApp -p --title \"$title\" \
    --icon \"$icon\" \
    --message \"$message\" \
    --messagefont "name=Arial,size=15" \
    --small \
    --button1text "Set" \
    --button2 \
    --ontop \
    --moveable \
    --textfield \"Computer Name\""
    
    computerName=$(eval "$dialogCMD" | awk -F " : " '{print $NF}')
    
    if [[ $computerName == "" ]]; then
      echo "Aborting"
      exit 1
    fi
    
    scutil --set HostName "$computerName"
    scutil --set LocalHostName "$computerName"
    scutil --set ComputerName "$computerName"
    
    # Run Jamf binary command to update inventory record with new computer name
    /usr/local/bin/jamf recon -setComputerName "$computerName"
    
    # Echo new computer name for logging
    echo "Computer Name is now $computerName"
    
    exit 0

    Note that this script doesn’t install swiftDialog or run any checks. The assumption is that it’s already setup and working. If you need something like that, Dan Snelson has some great code for pre-flight checks in his Setup-Your-Mac-via-Dialog script that you could easily co-opt.

    You can find this script and more in my GitHub repo: https://github.com/trevoedwards/JamfStuff/

    How are YOU using swiftDialog? I’d love to hear about it!

    13 November 2023
    Blog, Spotlight
    jamf, macos, scripts, swiftdialog
  • Jamf Pro 10.49.0 – Upcoming Features & Deprecations!

    Today I was going through the release notes for Jamf Pro 10.49.0 (almost a week late to the party, I know) and was pleasantly surprised by the number of meaningful changes in this release. From LAPS to the mention of Jamf Remote Assist to a bunch of deprecations.

    There’s some awesome stuff in there and I really want to share it!

    Let’s talk about LAPS and the deprecation of the Management Account Password

    In previous versions of Jamf Pro, you could choose to set the management account password (Settings > Global > User-initiated Enrollment > macOS, if I remember correctly) instead of having it randomly generated. From here on out, you won’t have the option to set a static password on the Management Account and will instead need to leverage LAPS.  

    You’re able to implement LAPS using either, or both, of the following methods:

    MDM Command – Introduced with Jamf Pro 10.46.0, this method leverages Apple’s SetAutoAdminPassword command, which allows management of the managed administrator account created during the PreStage enrollment process using MDM. This method rotates the managed administrator account password using the MDM command. LAPS is disabled by default using this method. The managed administrator account is created via a PreStage enrollment (Automated Device Enrollment) during the macOS Setup Assistant.

    Jamf Management Framework – Starting with Jamf Pro 10.49.0, this method automatically rotates management account passwords using instructions from the Jamf management framework. LAPS is always enabled using this method. You can create the management account on all enrolled computers using either Automated Device Enrollment or user-initiated enrollment. Some advantages of this method include the following:

    • Automatic password rotation is always enabled.
    • You can enable LAPS even though the management account was not originally created via PreStage during the macOS Setup Assistant.
    • If the management account had cryptographic privileges with a secure token, those privileges are maintained during password rotation.

    One thing to note here is that an account that has become encrypted with a secure token will result in the login password being changed. However, the new password will not work for user authentication purposes. Bottom line is that Jamf does not recommend using this account type for LAPS password rotation if the account needs to use FileVault or authorize software updates on computers with Apple silicon.

    Read more here: https://learn.jamf.com/bundle/technical-paper-laps-current/page/LAPS_Mechanisms.html

    Jamf Remote Assist Announcement

    Jamf Remote Assist, a new screen-sharing feature, will be coming in a future release of Jamf Pro for both on-premise and cloud-hosted environments. Remote Assist will allow you to securely initiate a session to remotely manage computers and help users troubleshoot issues. Using the Jamf Pro interface or the command line, Remote Assist sessions will allow you to connect to an end user computer even when the user is not on the internal network. Additional details will be included in the Jamf Pro release notes in the future.

    https://learn.jamf.com/bundle/jamf-pro-release-notes-current/page/Important_Notices.html

    This one is huge, in my opinion.

    In today’s world, remote capabilities should be built into the foundation of any MDM and for the longest time this was, arguably, Jamf’s weakest area.

    When I started my current career in 2019, Jamf Remote was still being provided in the DMG of tools in your product dashboard but during jump start my Jamf engineer cautioned that there was a plan to retire it, so I shouldn’t rely on it too heavily. As a result, I only used Jamf Remote a handful of times during my first year of managing macOS devices and primarily leveraged Microsoft Teams for screensharing (definitely not ideal).

    Then, in 2021, Jamf announced TeamViewer integration! At the surface level, this was awesome but it also meant that additional licensing would come into play. Since my organization didn’t already use TeamViewer, the thought of purchasing licensing for just our Mac fleet didn’t fly.

    Fortunately, I run a well-oiled and reasonably sized machine, so the need for screen-to-screen troubleshooting is almost nonexistent. Still, any improvement in this area would be a welcome one. I’ve talked to other admins who work in education, and I KNOW they’re dying for something like this.

    READ MORE
    14 August 2023
    Blog
    jamf, jamf pro, macos, mdm, release notes
  • LiveAtlas – a Custom Frontend for Dynmap

    Recently, I spent a lot of time diving into the Minecraft mod/plugin Dynmap.

    It’s an awesome tool and if you run a Minecraft server and don’t know about it, you should check it out!

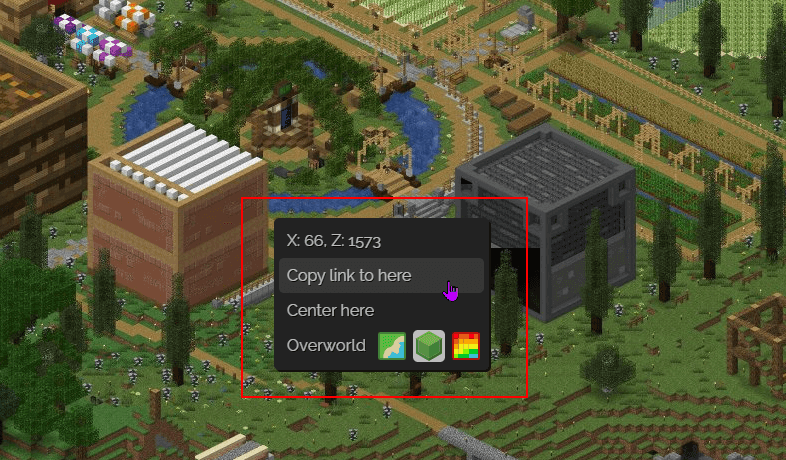
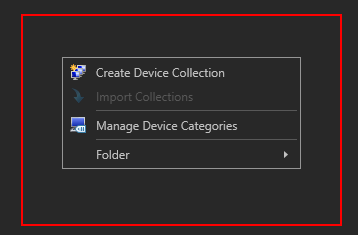
    While trying to figure out how to setup a standalone web server for Dynmap, I came across LiveAtlas. It’s an alternative frontend for Dynmap (and also supports Squaremap, Pl3xmap and Overviewer) that adds a much sleeker interface to the web ui, as well as some cool features like being able to right-click on the map and get a context menu:

    These kinds of things are big part of why I love the Minecraft community! The amount of high quality tools/plugs/mods that people have poured their time and skills into for the community are immense.

    Installation

    Installing LiveAtlas on your Minecraft server is extremely straightforward and easy. It literally functions as a “drop-in” replacement for Dynmap’s web GUI.

    1. Download the latest release of LiveAtlas
    2. Extract that into your dynmap/web folder
    3. Prevent Dynmap from overwriting the LiveAtlas index.html by changing the update-webpath-files to false in Dynmap’s Configuration.txt file (verions of Dynmap older than 3.3.2 need to set the index.html file to read-only)

    The index.html file can be modified to add custom favicons and additional customization.

    Are you using Dynmap or LiveAtlas on your server? How do you have it setup? Drop a comment below and let me know!

    14 August 2023
    Blog, Tutorial
    dynmap, minecraft
  • Self-Hosted Headaches with Caddy, Dynmap, and Docker!

    As some of you may know, I love Minecraft!

    I run a Forge-modded server for some friends and use a mod called Dynmap (which is also a popular plugin by the same name). This mod allows players to view a map of the entire Minecraft world in their browser and see the locations of other players.

    This had been working out beautifully until our world started to grow rather large in file size. You see, Dynmap renders/generates map tiles based on chunks in your world and the larger your world is, the more map tiles there are. For some context, my world is about 9GB and the Dynmap files that make up the map come in around ~43GB.

    That’s a lot of space! And I knew that was going to be an issue as our world grew.

    I manage my Minecraft server using AMP and it lives within an Ubuntu virtual machine dedicated to Minecraft, which lives on a node in a Proxmox cluster.

    I could have just assigned more space to the VM and called it a day (which is what I did as a short-term solution), BUT I have a NAS with lots of space hosted on another node within the same Proxmox cluster, on the same local network, and I began to wonder if there was a way to offload the storage component of Dynmap from the Minecraft server to the NAS.

    As it turns out, there is!

    READ MORE
    5 August 2023
    Blog, Tutorial
    caddy, docker, docker compose, dynmap, minecraft
  • Jamf Connect & Custom Menu Bar Action Items!

    Last year I assisted an organization with the rollout of Jamf Connect using OKTA as their IdP. While I was putting together the standard configuration profiles for the Login Window and Menu Bar, I looked at the documentation to double-check my work and realized I had pulled up the documentation for a much older version of Jamf Connect.

    Some of the keys listed in that old document were no longer listed on the up-to-date one and that got me wondering about undocumented key pairs and if there were any that were still usable. In turn, this led me down a rabbit hole on the MacAdmins Slack, which finally led me to Custom Menu Bar Action Items.

    What the heck are those, you ask?

    To put it simply, the Jamf Connect Menu Bar is extensible and allows for custom interactive menu items.

    Jamf has some great documentation here: https://learn.jamf.com/bundle/jamf-connect-documentation-current/page/Custom_Menu_Bar_Action_Items.html

    You can leverage this to do things like: launch Applications (this can be useful for connecting to VPN), display information/links, and run scripts.

    Now, while I was plenty comfortable with setting up and rolling out Jamf Connect, Custom Menu Bar Action Items weren’t something I had played around with before, so I was immediately interested!

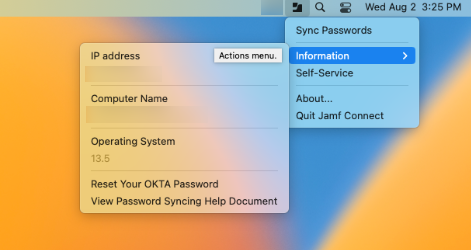
    After a few hours of tinkering this is what I ended up with:

     The “Information” menu displays the machine’s name, IP address, and Operating System. I also included two links at the bottom relating to password resetting. Really anything can be put here, this use-case focused on quick information for the service desk in the event any troubleshooting was needed.  

    That’s the WHAT and WHY, let’s get to HOW!

    First thing we’ll need to do is modify our existing Menu Bar Configuration Profile. If you’re just starting to roll out Jamf Connect and haven’t setup a Menu Bar Configuration Profile yet, I would recommend using the Jamf Connect Configuration tool provided by Jamf as part of the Jamf Connect DMG installer.

    This page will also come in handy: https://learn.jamf.com/bundle/jamf-connect-documentation-current/page/Menu_Bar_App_Preferences.html#reference-3250

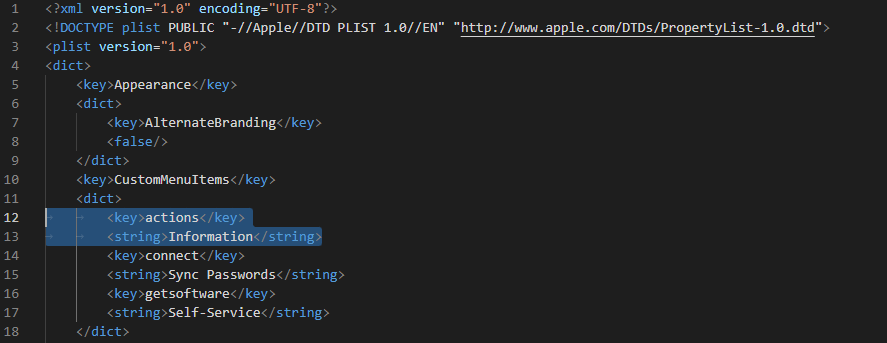
    In our existing Menu Bar Configuration Profile we need to add the key actions, which is calling out a Custom Action Item. We’re using Information as the string but you can call this whatever you’d like. This will be what the pop-out menu from the first screenshot will be labeled.

    Next we need to actually create the configuration for our Custom Action Items. Using the example provided by Jamf as a foundation, I began checking GitHub and Slack for other examples to see what all could be done. Once I realized that small commands could be run within each “button” a whole world opened up!

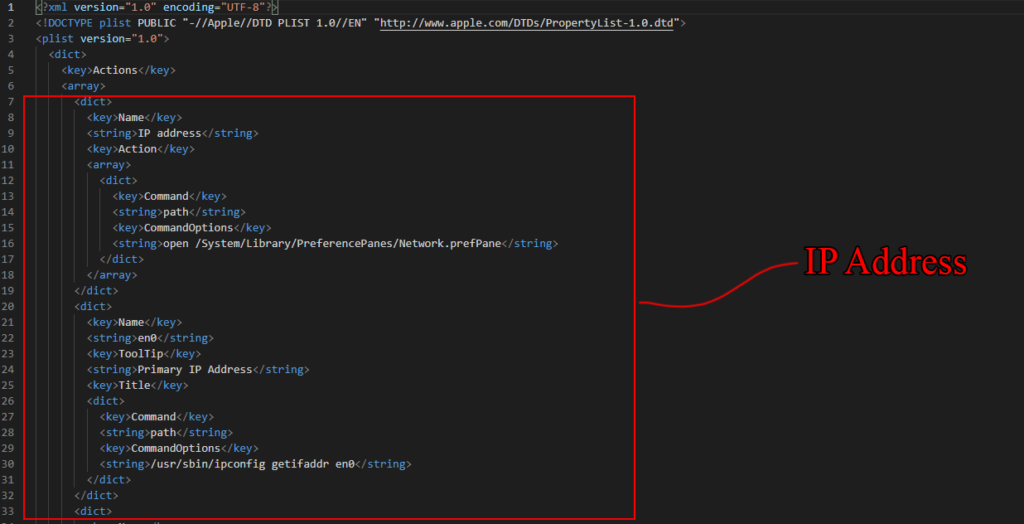
    This is what the chunk of the profile looks like that displays the IP Address in the Menu Bar:

    Are you using Custom Action Items in your Jamf Connect setup? If so, I’d love to hear about it!

    Leave a comment below!

    The full Menu Bar Action Item Configuration Profile can be found on my GitHub: https://github.com/trevoedwards/JamfStuff/tree/main/MenuBarActionItems

    2 August 2023
    Blog, Tutorial
    configuration profiles, jamf, jamf connect, macos, mdm
  • Default Dark Mode – Extended!

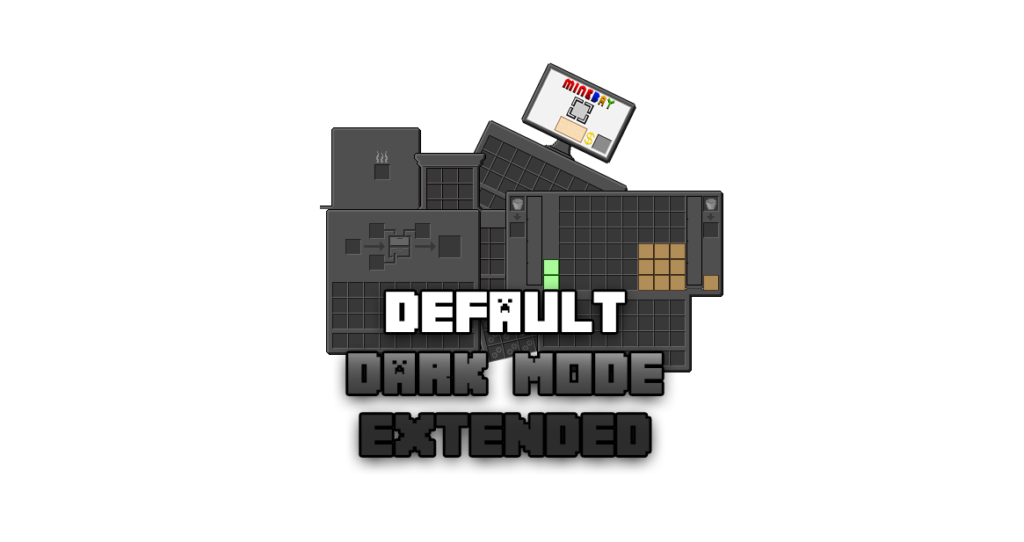
    Very happy to announce a long overdue update to my severely neglected Minecraft resource pack – Default Dark Mode Extended.

    This pack adds ‘dark mode’ GUI variants for a number of Forge mods (entire list of supported mods can be found: here)

    It was inspired by and intended to be used alongside nebuIr’s Default Dark Mode resource pack. All credit for color pallet and design goes to nebuIr.

    Since this pack only replaces GUI’s, it can be used with other texture packs!

    It was created for Minecraft 1.12.2, but can likely be used on other versions. Your mileage may vary. You may create an issue on Github to request a port to a specific version of Minecraft and I’ll see what I can do.

    Next release will be a HUGE one featuring the likes of Futurepack, Galacticraft, Mekanism, OpenComputers, and RFTools. I’m already around 30% done, so I should have it out in the month or so, but don’t quote me!

    18 July 2023
    Blog, Spotlight
    dark mode, minecraft
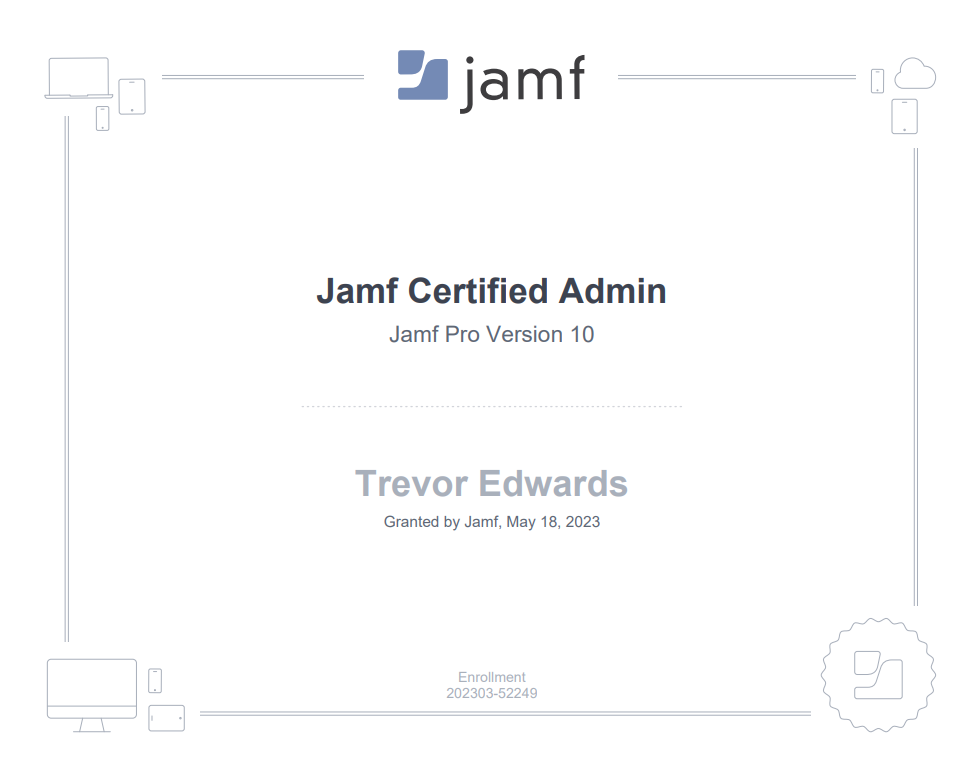
  • Jamf 300 Certified! 🥳

    My two-cents: The 300, like the 200, contains a lot of surface level content. There is certainly more “meat” to this course/exam and the little bit of API content that is covered is great! I thought they could have spent more time on plists, as I’ve found them to be immensely useful for things like deferrals.

    JamfHelper gets a fair chunk of time (I get it, it’s a built-in tool – let it shine), but I’m not sure who is still leveraging it in a world where things like swiftDialog exist.

    (Don’t worry, I hear all of the people still on Catalina screaming in the back of the room. My response: Update already! 😂)

    Anyway, my favorite part of these courses has been listening to other students talk about their environments, the issues they run up against, and how they go about solving those issues.

    I love getting a different perspective on problems and their solutions!

    19 May 2023
    Blog
    jamf, jamf pro
  • A Simple Method for Keeping Gatekeeper enabled with Jamf Pro

    Gatekeeper is a security feature on macOS that is designed to protect your system from malicious software by limiting the apps that can be installed and run on your system. Only allowing apps that are downloaded from either the Mac App Store or from those who have signed their apps with a certificate issued by Apple.

    While it’s extremely useful for keeping your macOS environment secure, there are times when a user may need to disable Gatekeeper temporarily.

    My organization’s use-case for this is that we have a team of developers who are often running test builds of applications that are unsigned because they’re in development. So we have a process for user’s to go through to disable Gatekeeper temporarily.

    However, we want to ensure that there are no gaps and that Gatekeeper will always be re-enabled across the environment.

    To accomplish this, we leverage Jamf Pro’s Smart Groups to detect if Gatekeeper is disabled (the status of machines in this group will update after an inventory scan on each device) and a script deployed via a Jamf policy to re-enable it on the machines that show up in our smart group.

    READ MORE
    24 April 2023
    Tutorial
    apple, gatekeeper, jamf, jamf pro, macos
  • ComicTagger! 💭

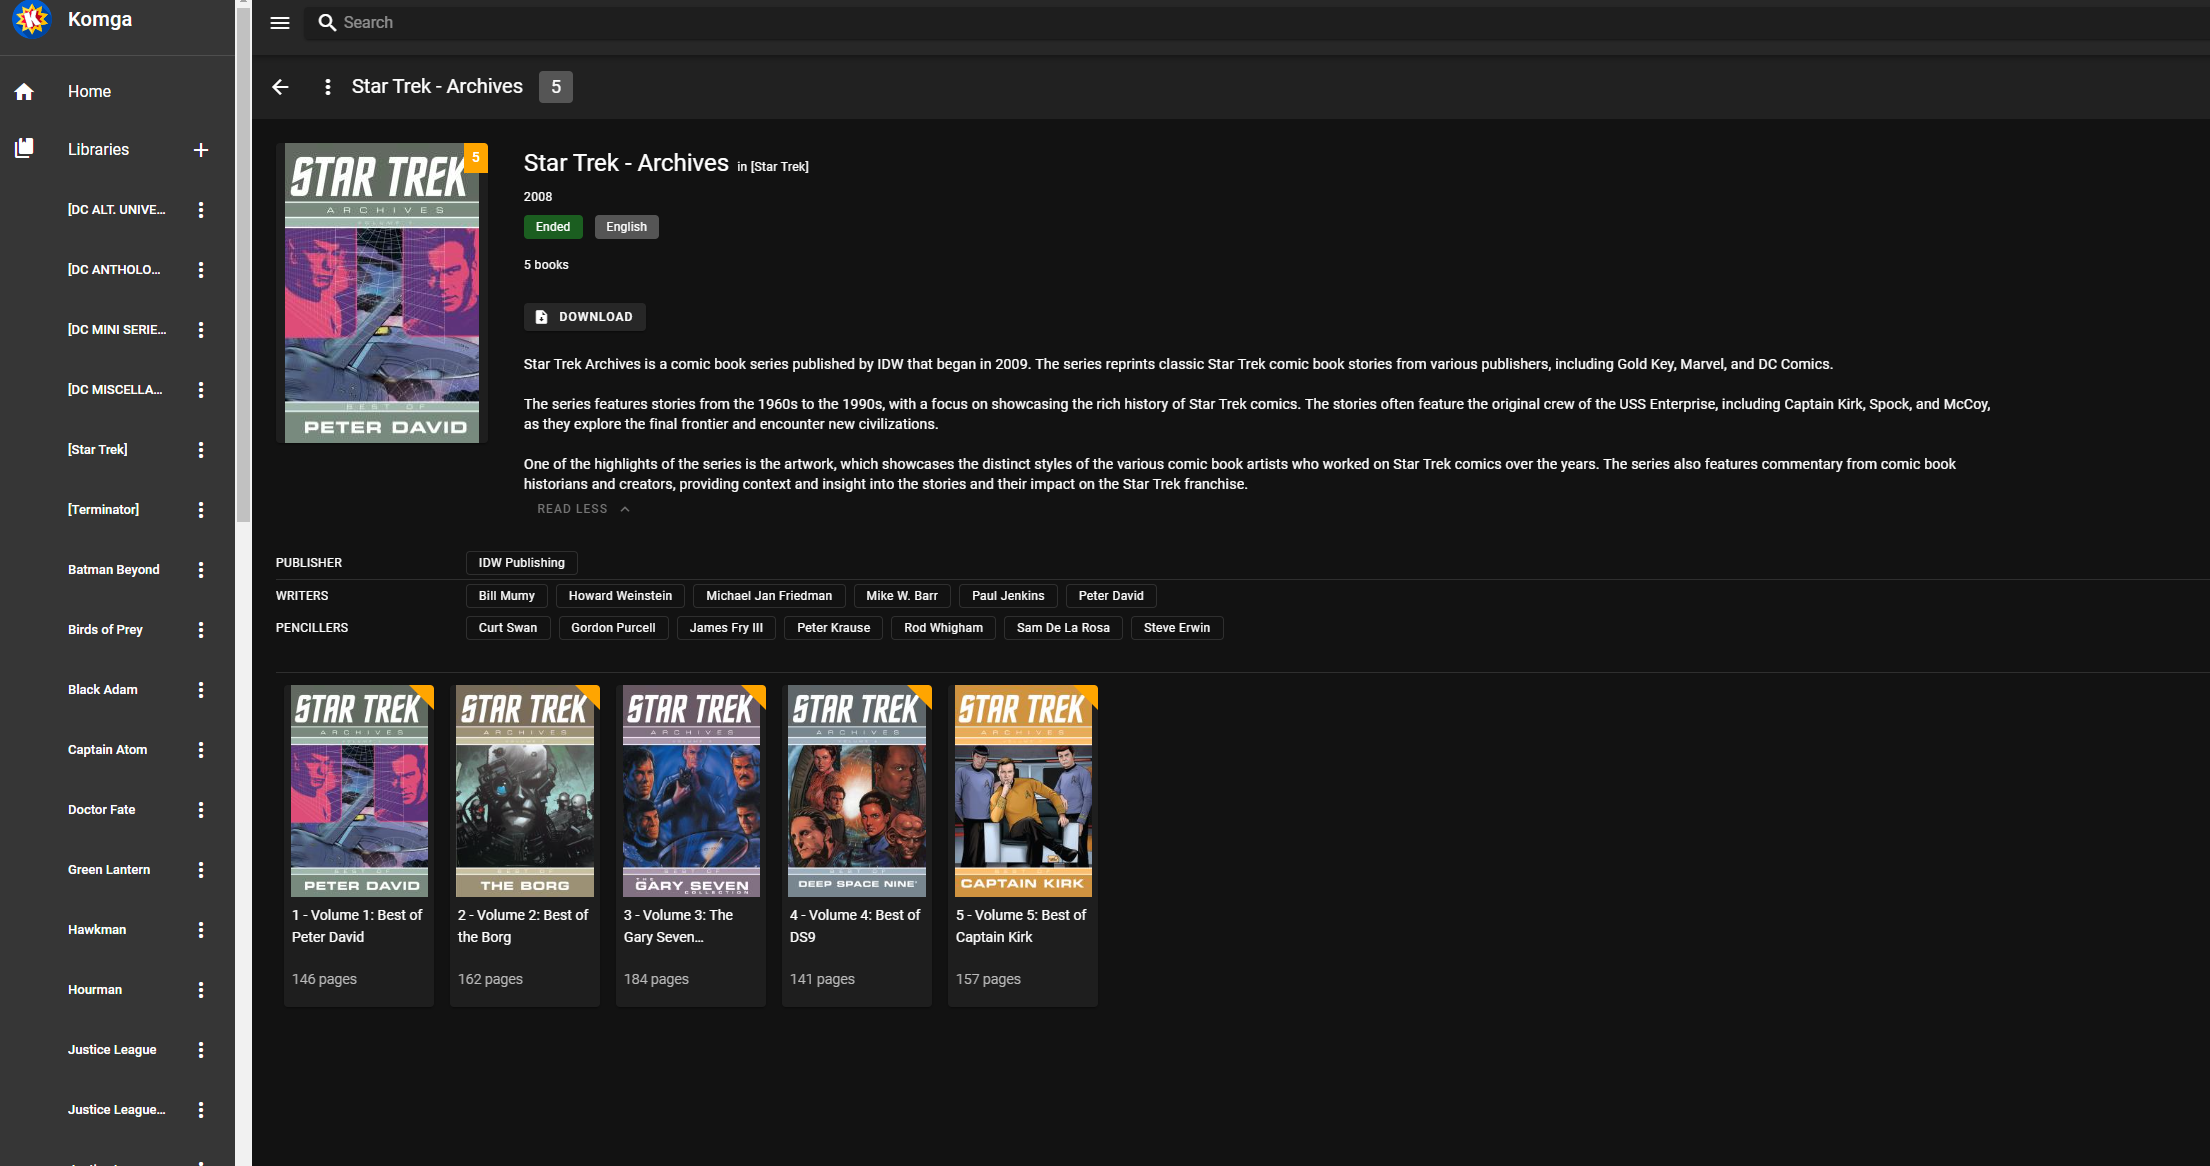
    I have a large (like, hundreds of GB’s) digital library of comic books that I’ve acquired over a decade of hoarding. Obviously, content has come from all kinds of different sources over the years and so the quality of the metadata ranges wildly, from very detailed to non-existent, from file to file.

    That’s where ComicTagger comes in.

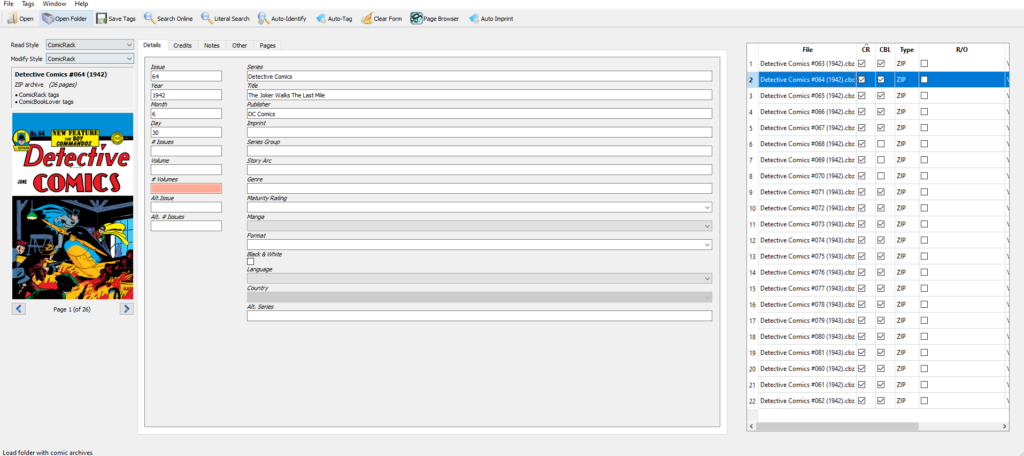
    It’s an extremely powerful free and open-source program designed for organizing and managing digital comic book collections.

    The program provides a set of tools & GUI that allow users to view and edit the metadata of comic book files in various formats such as CBZ, CBR, CB7, and PDF.

    It can automatically identify and tag comic books with metadata such as the title, author, publisher, and issue number by scanning Comic Vine’s online database. It also allows users to edit and add their own metadata, such as custom tags, summaries, and notes.

    In addition to managing metadata, ComicTagger also has tools for organizing and renaming files, creating custom cover images, and exporting lists of comics. It also offers a batch processing feature (via Auto-Tag) that allows users to apply changes to multiple files at once.

    This is especially helpful for removing unnecessary information from files names to ensure that you get the best match when looking for metadata.

    On the subject of metadata – while not strictly necessary, it’s recommended by the developers to get a personal Comic Vine API key and use that when tagging with ComicTagger.

    This is because Comic Vine implements a per-key limit on API access rates. Since the default application key is shared, it may already be exhausted by other users.

    To obtain a Comic Vine API key, you will need to follow these steps:

    1. Go to the Comic Vine website at www.comicvine.com/signup and create an account.
    2. Once your account is created log in and navigate to the API section of the website.
    3. In the API section, click on the “Get An API Key” button.
    4. You will be asked to provide some information about the intended use of the API key, such as the name of your application and its website or description. Fill in the required information and click the “Submit” button.
    5. Once approved, copy & paste your API key into ComicTagger via File > Settings > Comic Vine > Comic Vine API Key

    It’s important to note that Comic Vine limits the number of requests that can be made using the API key. Make sure to read their terms of service and use the API responsibly.

    You can read more about ComicTagger and its features here!

    22 April 2023
    Spotlight
    comic books, comics, comictagger, metadata

Trevor Edwards

© 2023