
Recently I moved my home lab environment over to Proxmox and started containerizing all of my services.
I’ll admit, when I first started playing around with Docker I was confused as hell!
At its core, it’s all pretty simple but you can get lost in abstraction pretty quickly if you let yourself get side-tracked. That being said, let’s get on track!
I’m going to use Docker Compose to create a “stack”
Docker Compose is a tool for defining and running multiple Docker containers at once. It allows you to create, start, and stop containers with multiple interconnected services, such as databases, web servers, and APIs, all using a single YAML file.
Okay, so what is a stack you ask?
A stack is basically a grouping of services that you have configured in a single Docker Compose/YAML file.
Our stack will be called HostedMediaServices and will be used to serve our media libraries out to our local network (and beyond). This will include Plex (for sharing movies and TV shows), Komga (for sharing comic books/manga), and FireShare (for sharing small, self-hosted clips with unique links).
The full compose file is available on my GitHub.
If you want to follow along, you’ll need a couple of things:
- Linux (I’m using Ubuntu, you can use whichever distro you’d like)
- Docker (you’ll need Docker-Compose as well, which comes bundled with Docker Desktop)
- A text editor – anything will work, really, but I would recommend either VSCode or Sublime Text.
To get started, let’s break down what a Docker-Compose file actually IS.
I’ve put together an example Compose file below and included comments explaining the function of each line.
---
    version: "3.8"
    #The version of Docker Compose being used

    services:
    #The services that you want to spin up get indicated here
      coolprogramhere:
      #Service name
        image: dev/coolprogramhere:latest
        #The image that's being used to deploy the container (:latest indicates the latest version of that software is being called)
        container_name: uptime-kuma
        #The name of the container
        volumes:
        #The volumes being mounted to the container for persistent storage go under here
          - /path/to/data:/app/data # like so
        ports:
        #Port that's used 9999 is the external port exposed to the container, 3001 is the internal port
          - 9999:3001
        restart: always
        #If stopped, the service will restart
Additionally, we’re going to be mounting network shares as the persistent storage volumes. Below is a quick and dirty example/explanation of how to do so:
volumes:
#SMB Shares to be Mounted
  example_db:
  #What we're going to call the volume
    driver_opts:
      type: cifs
      #Type; whether cifs or nfs
      o: "username=USERNAME,password=PASSWORD"
      #Username & password for the account used to access the share
      device: "//IP.ADDRESS/PATH/TO/LIBRARY"
      #Network location of the share we're mounting
If you want a deep dive into Docker Compose, NetworkChuck has an awesome video on the subject!
Now that all of that is out of the way, let’s get our services up and running!
We’re going to want to create a folder called HostedMediaServices [check the end of this post for why that’s important] and put our docker-compose.yaml file in there. At this point you’ll want to use VSCode or Sublime to edit the docker-compose file to accommodate things specific to your environment (like ports and storage). Then, we’ll want to open terminal from our HostedMediaServices folder and enter:
sudo docker-compose up -dThis command will start our services based on the configurations specified in our docker-compose file.
If successful, the output of your terminal window should look like this:
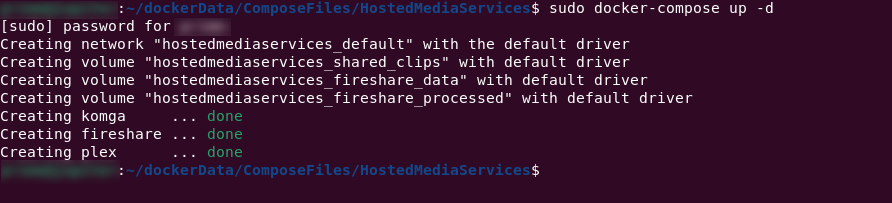
You can check out the guides for each service to learn how to access their web interfaces.
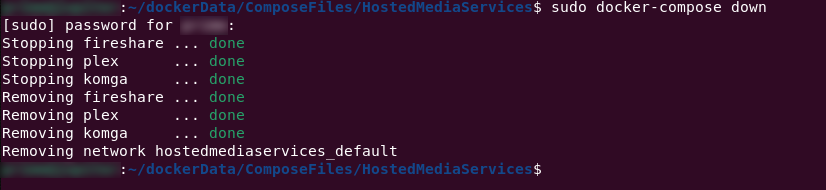
You can shut your services down by entering the following command into terminal:
sudo docker-compose downIf successful, you should see the following in your terminal window:
And that’s it!
Give yourself a pat on the back because you’ve just set yourself up a server. 👍
Do note that the folder that your docker-compose file is in will be the name of your “stack” in container managers like Docker Desktop or Portainer. Food for thought.
[…] a previous post I went over how I use Docker Compose to build out and manage my self-hosted services. In this post, […]